使用hexo+github部署个人网站
1、M1中安装hexo
参考:https://zhuanlan.zhihu.com/p/546198492
1.1、node.js安装
因为后面要用到npm install,而npm被集成到了node中,所以首先来安装下node.js。
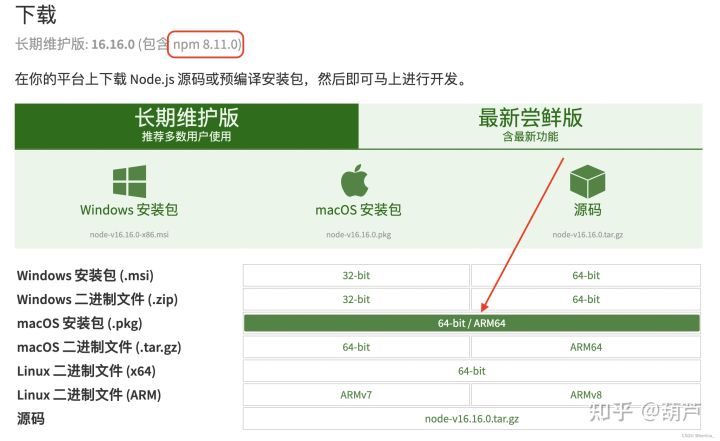
- 下载地址:node.js下载
- 如下图:M1的选择ARM64那个
安装成功后,可在终端通过-v查看是否安装成功:
1 | node -v #查看node版本 |
1.2、安装hexo
安装hexo代码,在终端输入:
1 | npm install hexo-cli -g |
我在执行这一步的时候报错提示:
Error: EACCES: permission denied, mkdir ‘/usr/local/lib/node_modules/hexo-cli’
搜了一下,是mac和win都很普遍的权限问题,解决方法如下:
1 | sudo chown -R $(whoami) $(npm config get prefix)/{lib/node_modules,bin,share} #修改权限范围 |
然后再次执行npm install hexo-cli -g即可
1.3.初始化本地博客文件夹
1 | # 博客初始化,这里是创建的本地博客文件夹,执行后会自动创建,我这里图简洁,直接用了我网站的地址hihulu.github.io为文件名 |
以上执行后,你就可以通过访问本地网站“http://localhost:4000/”,看到自己网站的一个大概啦
2、安装主题
使用的主题:https://github.com/chaooo/hexo-theme-BlueLake
安装说明:https://chaooo.github.io/2016/12/29/bluelake.html
3、GitHub上部署
3.1、创建仓库

3.2、配置git
在仓库的code页面,复制ssh链接:
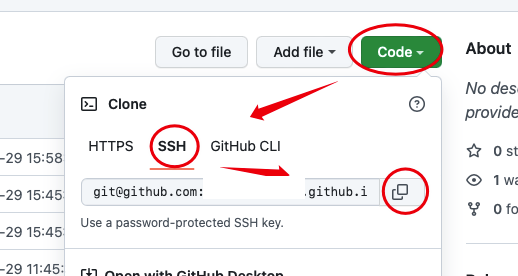
在根_config.yml文件deploy中,填入ssh地址:

1 | deploy: |
当使用hexo d将项目push到GitHub时,可能会出错,因为本机中没有配置ssh信息:
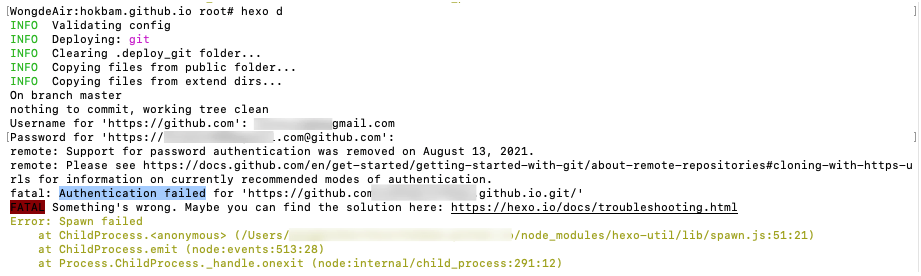
参考解决方案:https://blog.csdn.net/weixin_45434534/article/details/104567870
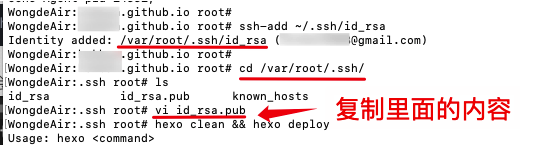
在mac终端进行如下操作:
1 | ssh-keygen -t rsa -C "此处为GitHub的邮箱地址" |
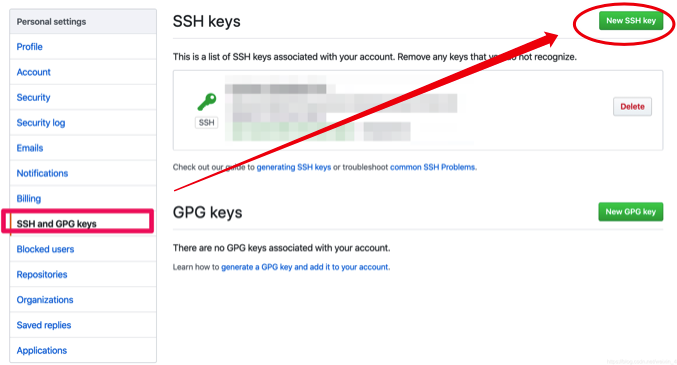
将生成的.pub文件中的内容,在GitHub上创建SSH KEY
GitHub网站路径:右上角头像->Setting:
再次执行 hexo clean && hexo deploy,git上传成功:
